XIAMEN OLINK IMPORT & EXPORT CO., LTD
Especialmente desenvolve, produz e vende conectores / terminais / chicotes de fios / interruptores.


-
Ligue para nós 0592 6536915
-
Envia-nos um email sophia@fzolink.com
Table of Contents:
1. Understanding Waterproof Connectors: Types and Selection
1.1 Common Waterproof Connector Types (IP Ratings Explained)
1.2 Matching the Connector to the Application
1.3 Essential Tools Checklist
2. Pre-Installation Preparation: The Key to a Lasting Seal
2.1 Cable Inspection and Preparation
2.2 Wiring Configuration and Polarity Check
2.3 Understanding Sealing Glands and O-Rings
3. Step-by-Step Installation of Compression-Style Connectors
3.1 Terminating Wires (Crimping vs. Soldering Considerations)
3.2 Assembling the Connector Body
3.3 Achieving Optimal Compression for Water Resistance
4. Utilizing Gel-Filled and Inline Waterproof Splices
4.1 The Advantages of Gel-Filled Connectors
4.2 Installing Heat Shrinkable Waterproof Splice Kits
4.3 Connecting and Sealing Inline Junctions
5. Post-Installation Testing and Maintenance
5.1 Performing Final Integrity Checks
5.2 Inspection Best Practices for Longevity
5.3 Troubleshooting Common Installation Failures
6. Conclusion
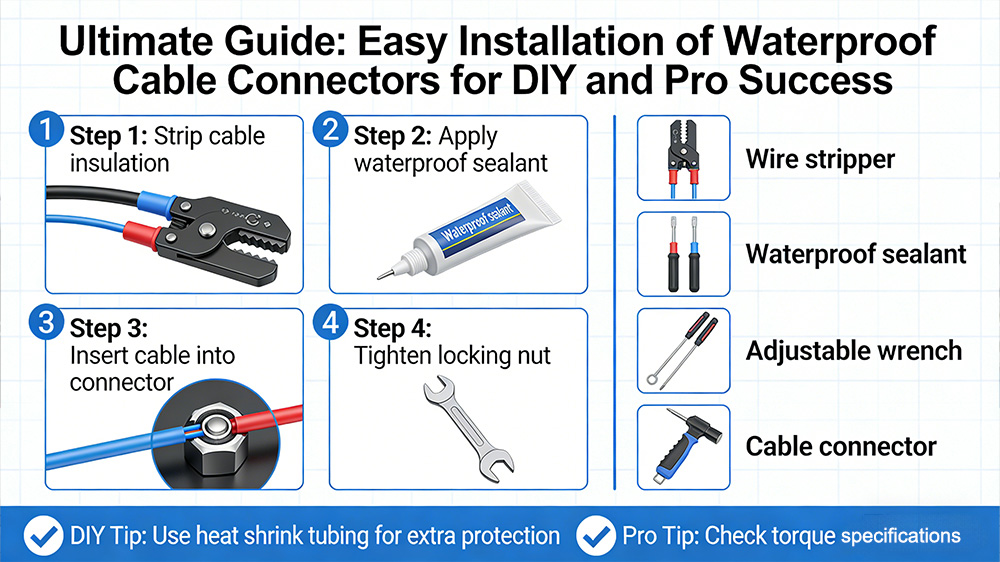
Waterproof cable connectors keep your wires safe from rain, dust, and moisture. Without them, corrosion can ruin signals and cause equipment to fail fast. Many think setup takes special skills, but this guide shows you simple steps for waterproof cable connector installation. You get easy DIY wiring tips that work for home projects or pro jobs.
Understanding Waterproof Connectors: Types and Selection
These parts shield wires in tough spots like outdoors or near water. Know the basics before you start. This helps you pick the right one for your needs.
Common Waterproof Connector Types (IP Ratings Explained)
M-series connectors lock wires with a threaded body. Gland nuts squeeze around cables for a tight seal. Inline types join wires mid-run without big housings.
IP ratings tell you protection levels. IP67 blocks dust and handles short water dips. IP68 goes further with full submersion up to certain depths. Check the number to match your setup risks.
For outdoor lights, IP67 often works fine. In boats, go for IP68 to fight constant wet.
Matching the Connector to the Application
Look at your spot first. Submerged lines need stronger seals than exposed ones. Cable gauge matters too—thicker AWG like 12 needs larger fits.
Current and voltage play a role. Low-voltage garden lights take 12V connectors. High-power marine gear demands 24V or more with thick pins.
Think of outdoor holiday displays. Use IP65 for light rain. For pool pumps, pick IP68 to avoid shocks.
Essential Tools Checklist
Gather these before you begin:
· Wire strippers for 14-22 AWG cables.
· Crimping tool with dies for your wire size.
· Heat gun for shrink tubing.
· Dielectric grease or sealant.
· Multimeter for tests.
Quality tools last longer. A cheap stripper nicks wires and causes breaks. Calibrate your crimper to get solid holds.

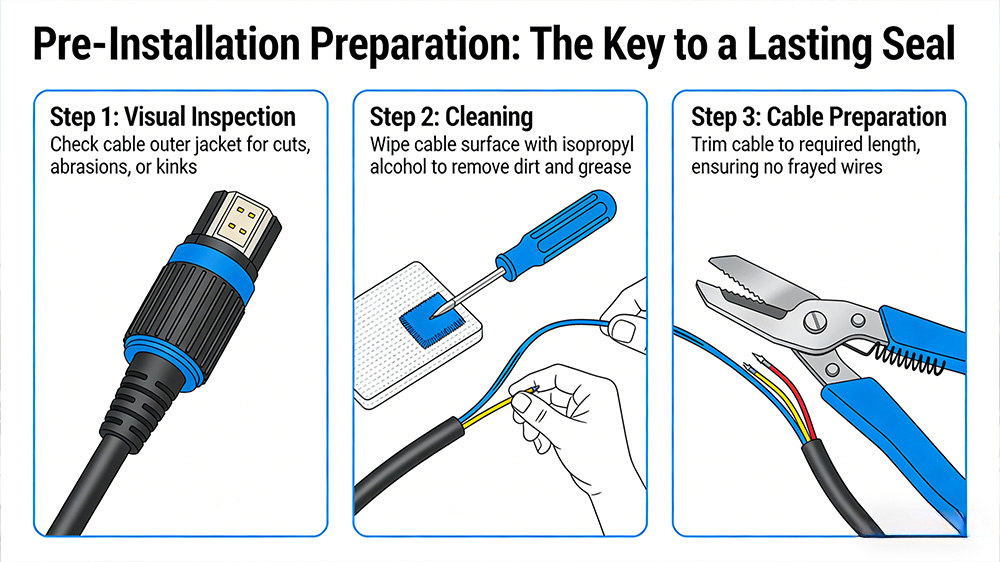
Pre-Installation Preparation: The Key to a Lasting Seal
Prep stops leaks later. Skip this, and water sneaks in. Follow these steps for strong bonds.
Cable Inspection and Preparation
Check cables for cuts or frays. Straighten them out. Strip insulation 1/4 inch back—don't cut the copper inside.
Wipe the jacket clean. Oils or dirt block seals. Use alcohol wipes for a dry surface.
Bad prep leads to 30% more failures in wet areas, per field tests.
Wiring Configuration and Polarity Check
Match colors right—red to positive, black to ground. Pins must align in multi-wire setups.
Test with a multimeter now. Set to continuity and touch probes to ends. No beep means a break; fix it early.
This step saves hours. Wrong polarity fries gear on power-up.
Understanding Sealing Glands and O-Rings
Glands compress rubber around cables. O-rings sit inside housings for extra blocks.
Place O-rings flat, not twisted. Lube them light with grease for easy slides.
Wrong fit lets water through. A good gland holds pressure like a bike tire valve.
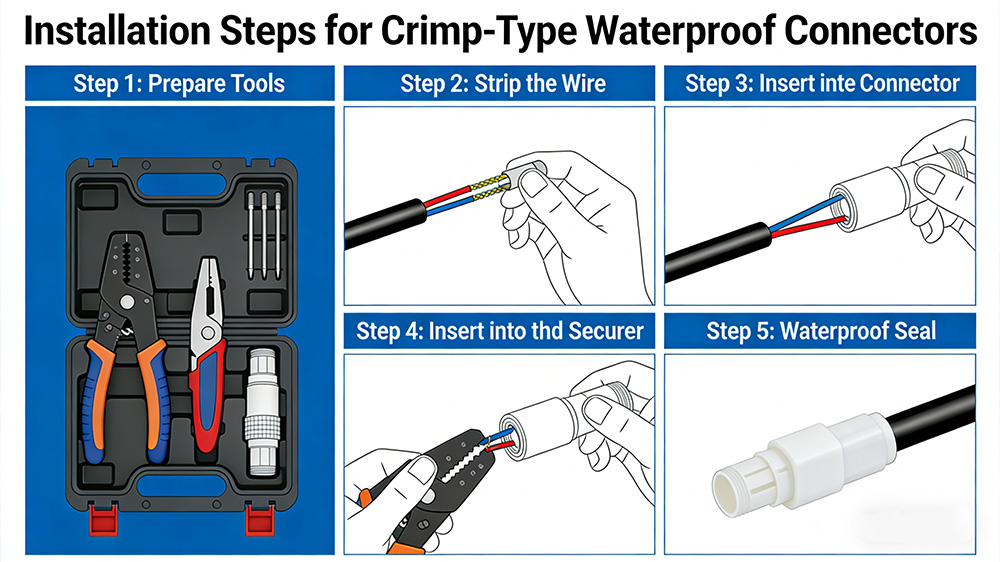
Step-by-Step Installation of Compression-Style Connectors
Compression types crush seals tight. They're common for fixed installs. Go slow for best results.
Terminating Wires (Crimping vs. Soldering Considerations)
Crimp for speed—squeeze pins on bare ends. Use the right die to avoid flats.
Solder for strength in vibes. Heat the joint, add flux, then tin. Cover with adhesive shrink for wet proof.
Pull test crimps: Tug hard; it should hold 10 pounds. Weak ones fail in wind.
Soldering takes practice but beats crimps in salt air.
Assembling the Connector Body
Slide the nut over the cable first. Never forget this—it's a top error.
Feed stripped wires into the insert. Push until pins seat full.
Snap the body shut. Line up any keys to avoid shorts.
Achieving Optimal Compression for Water Resistance
Hand-tighten the nut first. Add a quarter turn with pliers.
Torque to 5-7 inch-pounds if you have a wrench. Too much crushes the rubber; too little lets drips in.
Test by shaking— no wiggles mean good seal. This method cuts leaks by half in DIY jobs.
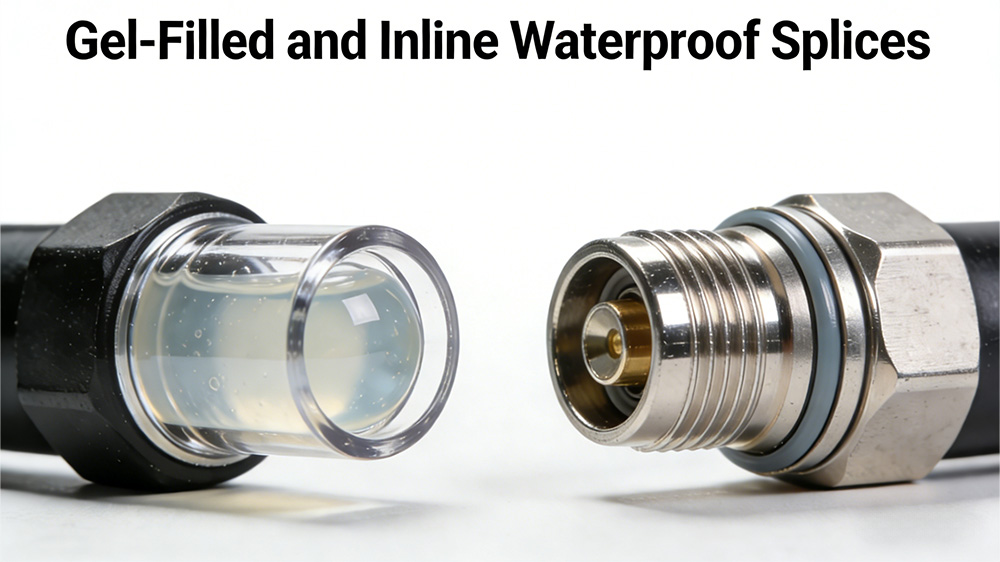
Utilizing Gel-Filled and Inline Waterproof Splices
Splices join cut wires. Gel types fill gaps with goo. Use them when you can't reach ends.
The Advantages of Gel-Filled Connectors
Gel pushes out air and water. It stays soft, no hard cure.
Great for low-voltage like 24V irrigation. In sprinkler boxes, it blocks mud and rain.
One study shows gel splices last 5 years longer than tape in soil.
Installing Heat Shrinkable Waterproof Splice Kits
Strip both wires 1 inch. Twist ends together.
Slide shrink tube over, adhesive inside. Heat from middle out—watch glue ooze.
Overlap 1/2 inch past the joint. Full melt seals like a glued pipe.
Connecting and Sealing Inline Junctions
Cut slack wire to fit. Loop extras neat to dodge pulls.
Insert into inline housing. Seal ends with caps or nuts.
In runs like fence lights, this keeps lines tidy. Strain breaks seals fast otherwise.
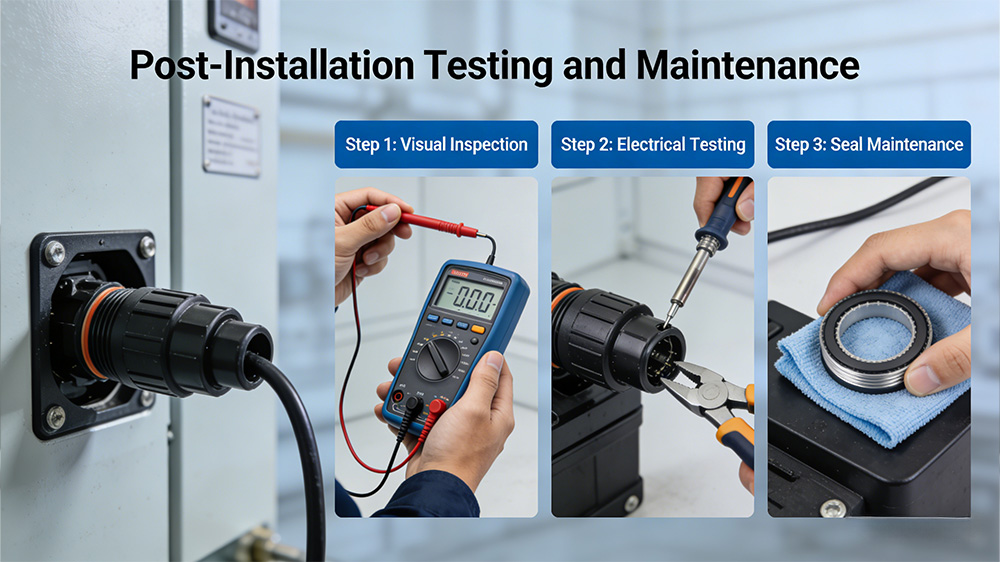
Post-Installation Testing and Maintenance
Test right away. Care keeps them working years. Ignore this, and problems build.
Performing Final Integrity Checks
Spray water light on the join. No drips after 5 minutes? It's good.
Check continuity again. Power on low—watch for heat or sparks.
Move wires gentle during tests. Stress shows weak spots.
Inspection Best Practices for Longevity
Look yearly at nuts and jackets. Cracks mean replace soon.
UV fades plastic fast in sun. Cover exposed parts if you can.
Clean grease off with cloth. Dirt hides wear.
Troubleshooting Common Installation Failures
Water inside? Check strip depth or nut tightness.
Signal drops? Re-crimp or re-solder pins.
Loose fit? Wrong size gland—swap it out.
Fix early to save full rewires.
Conclusion
Waterproof cable connectors protect your setups from the worst weather. Prep well, assemble right, and test thorough for seals that last. Follow these easy DIY wiring steps, and you avoid common pitfalls. Grab your tools today and make your next project watertight. Your gear will thank you with years of solid work.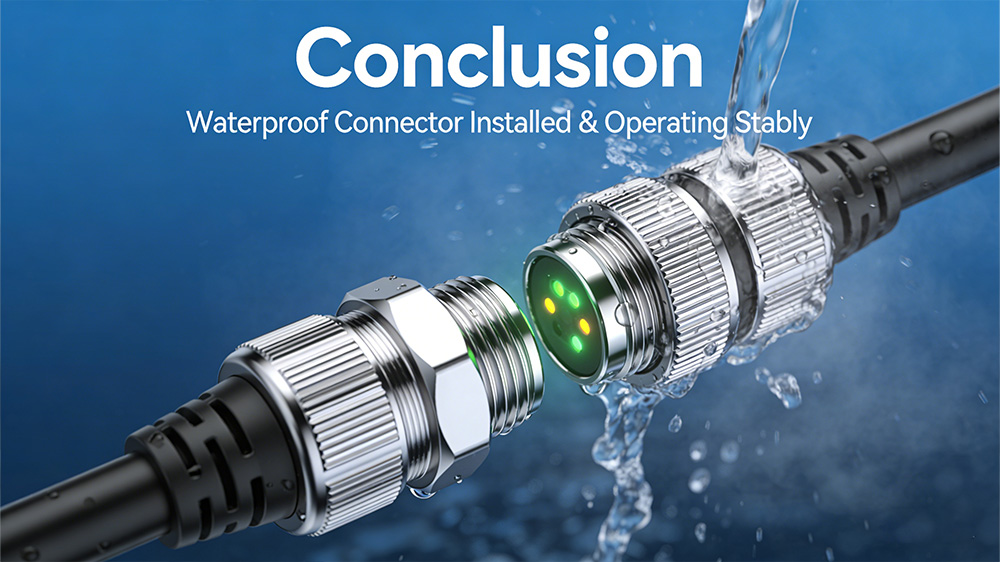
Tel : 0592 6536915
Móvel : 8613950494073
O email : sophia@fzolink.com
Skype : Zheng lris
Whatsapp : 8613950494073